
Sometimes plumbing can seem overly complicated and you may be wondering how you can pick up Journeyman level skills in time to complete your weekend project. Well thanks to advances in plumbing, often difficult tasks, can be completed with minimal skill and material. Yes removing wall or ceiling panels will also pose an obstacle but you can always hire someone to do that or you could DIY if you are good like that.
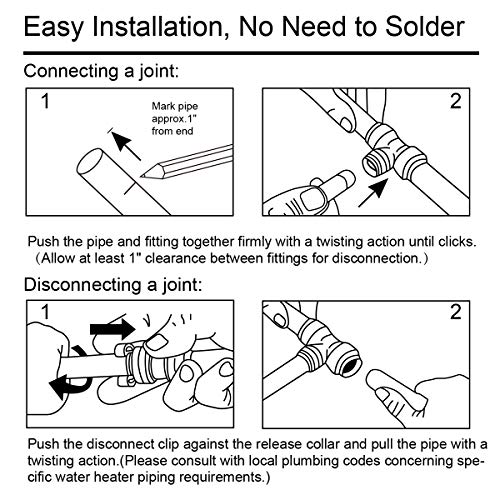
Often times plumbing can involve flux and solder and involve sweating out pipes. That means you need to get all the excess water out of the pipe for the solder to take and often can be in tight spaces, over-head or around bends. Plumbing is a maze all through-out your house or building, and like we mentioned there is an easier way.
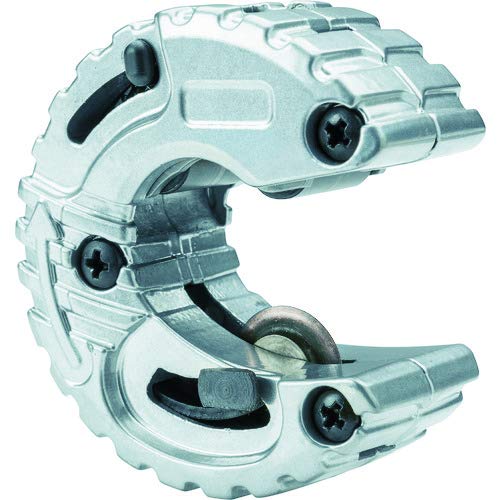
First you will want to find your leak if this is a repair or if this is a new installation you will want to figure out where your main source of water is coming from and go from there. This article is mainly dedicated to repairs so we will be talking about that from here on out. After you find your leak you are going to have to use a copper pipe cutter and get rid of the copper pipe. Most pipe in your house that transports water is going to be 1/2″-3/4″. You can find a cutter here.
After cutting your copper pipe you will want to sand the ends. This will remove any burrs or imperfections that could impose on the push-to-connect fitting from attaching properly. Sand and Deburr. Next make sure you have the right size fitting. Again we are dealing with 1/2″-3/4″. Fittings can be found here.

The picture above shows the difference between 1/2″ & 3/4″. You can step up in size or down in size with a fitting like this and cap off the side you do not use. You could also use the exact fitting you need and avoid capping off all together. Capping off is beneficial because in the future you can use the removal tool and add additional plumbing.
OH YEAH! And before you do any of this you will want to shut your water off. Just thought we should mention that because we did not earlier. SO don’t blame us if you get wet. if you have a valve before your leak, turn that valve off. If not, turn off your water main valve.
So instead of using copper like we mentioned earlier you can use a flexible piece of 1/2″ hose which we will refer to here from now on. (1/2″) Red is hot. Blue is Cold. Or you could also just use a white piece of hose for smaller, less referenced repairs.
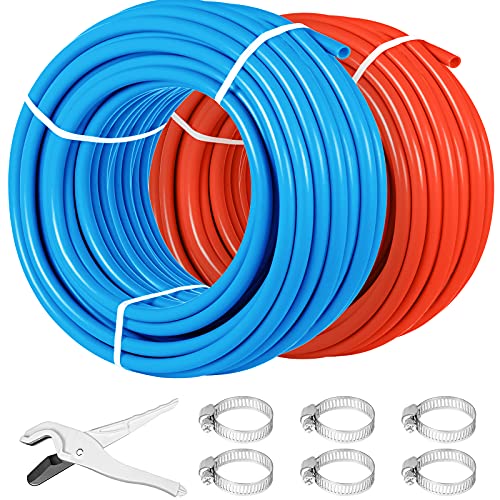
The above Kit also comes with a ratcheting cutting kit because that is the easiest and best way to cut the flexible hose. It is also possible to cut it with a razor blade, saw, or multi-tool but be careful not to injure or cut yourself. The cutting tool is very handy and safe.
That concludes our easier DIY copper plumbing repair with push-to-connect fittings. You will find all the supplies mentioned in this article useful for the job or for reference to something else you may purchase. We hope you finish your job safely and on time. And hope you choose us for your future needs in household and building repairs. Feel free to post any opinions or pointers below.
OH! Don’t forget to turn your water…back…on.